Mastering Home Recording: Unleash Your Inner Music Producer with Laptop Music Production
**Improving Vocal Recordings on a Laptop: A Comprehensive Guide**
For those looking to enhance the quality of their vocal recordings on a laptop using external microphones, this guide offers a step-by-step approach. From preparing the recording environment to optimizing laptop settings, the focus is on both the technical setup and the essential steps to capture clear, high-quality audio.
**Preparing the Recording Environment**
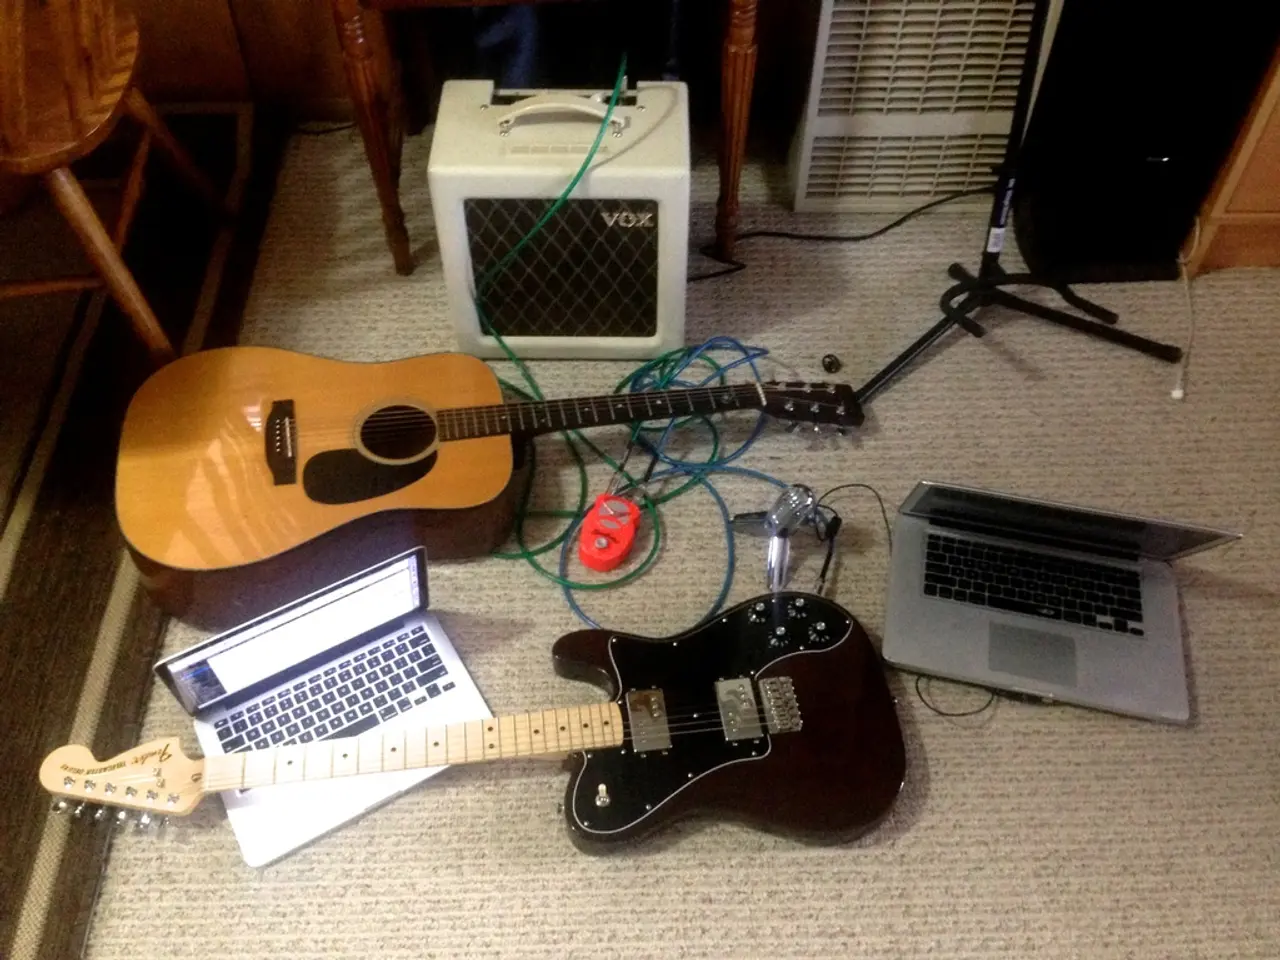
To minimize background noise and maximize vocal clarity, it's crucial to choose a quiet space free from ambient sounds like fans or traffic. Acoustic treatment may be necessary for optimal results. Placing the microphone on a shock mount or foam helps prevent table bumps or keyboard taps from being captured. When selecting a microphone, condenser microphones are ideal for capturing clear vocals.
**Setting Up Your Equipment Correctly**
Connect the external microphone to the laptop and ensure it's selected as the active input device in the system settings. Adjust input levels to avoid distortion, and use headphones for monitoring to identify background noise or channel mismatches.
**Optimizing Laptop Settings for Audio**
For improved sound quality and reduced latency, consider using an external audio interface. Optimize operating system settings for audio, adjusting power settings, disabling unnecessary system sounds, and using the ASIO4ALL driver for low latency (for Windows users).
**Enhancing Audio Post-Recording**
Use audio editing software to apply EQ and compression to enhance the warmth and fullness of your vocals. Avoid over-processing with noise reduction tools, keeping edits natural.
**Exporting in High Quality**
Export your audio files in a high bitrate format such as 256 kbps MP3 or even WAV for uncompressed quality.
**Maintaining Your Setup**
Regularly update your software to maintain compatibility and improve functionality. For Windows users, configuring sound settings, such as volume levels and microphone properties, is necessary for a smooth recording experience.
**Getting Started**
To start recording, open your chosen Digital Audio Workstation (DAW) from the start menu. Both built-in and third-party applications can enhance your recording process, offering a variety of tools for capturing vocals and instruments. Closed-back headphones are recommended for recording, as they minimize sound leakage that could be picked up by the microphone.
**Tips and Recommendations**
- Regularly save your session to avoid any loss of your music. - Subscribe to tech news websites and join online forums related to music production to stay informed about the latest tools and developments. - Press the record button to begin recording, and use the pause button to temporarily halt recording without ending it. - USB microphones are a good starting point for convenience. - When choosing the right microphone, external microphones generally offer better sound quality than built-in laptop mics. - Utilize noise reduction tools within your editing software to clean up your audio. - Utilize online converters to change file formats if necessary. - Studio monitors are designed for precise sound reproduction. - An audio interface is an essential piece of equipment that facilitates the use of professional microphones and instruments with your laptop. - Regularly back up your MP3 files to cloud storage or an external hard drive. - Your microphone or instrument should be properly connected and selected as the input source. - Use a shock mount to reduce vibrations. - Adjust latency settings in your audio software to prevent delay or echo during recording. - Bandicam is an application that can record audio without any video, which can be useful for podcasting or capturing streaming music. - Label each MP3 recording file clearly with the song title, the date, and, if needed, a version number. - Position the microphone to face away from potential noise sources, such as windows or doorways. - Use free audio editing software like Audacity to trim the beginnings or ends of tracks. - Dynamic microphones are tougher and better for loud sources like drums or guitar amps. - Do a quick test recording to adjust levels and ensure everything is set correctly. - Create a dedicated folder on your laptop for your recordings. - Isolate your microphone away from the laptop to avoid picking up internal fan or keyboard sounds. - Always use headphones to monitor your recording in real-time. - Audacity is a free, open-source option that offers various editing and sound-manipulation tools. - Find the optimal distance from the source for the best sound capture.
- For clear and high-quality vocal recordings, buy a home studio with a condenser microphone, an audio interface, and a Digital Audio Workstation (DAW).
- Place the microphone on a shock mount or foam to prevent table bumps and keyboard taps, and position it away from potential noise sources.
- Choose a quiet space for your home music studio, preferably free from fans or traffic, and acoustically treat the room for optimal results.
- Connect the external microphone to your laptop and select it as the active input device in the system settings.
- Use headphones for monitoring and adjust input levels to avoid distortion, and utilize noise reduction tools in your recording software to clean up any background noise.
- Regularly update your recording software and drivers to maintain compatibility and improve functionality.
- Export your audio files in a high bitrate format, such as 256 kbps MP3 or WAV for uncompressed quality.
- Utilize studio monitors for precise sound reproduction, and use closed-back headphones to minimize sound leakage during recording.


